
Warning: Undefined variable $tag in /home/gogohito/gogohito.com/public_html/wp-content/themes/cocoon-child-master/functions.php on line 79
Warning: Undefined variable $tag in /home/gogohito/gogohito.com/public_html/wp-content/themes/cocoon-child-master/functions.php on line 79
Warning: Undefined variable $tag in /home/gogohito/gogohito.com/public_html/wp-content/themes/cocoon-child-master/functions.php on line 79
Warning: Undefined variable $tag in /home/gogohito/gogohito.com/public_html/wp-content/themes/cocoon-child-master/functions.php on line 56
Warning: Undefined variable $tag in /home/gogohito/gogohito.com/public_html/wp-content/themes/cocoon-child-master/functions.php on line 79
Warning: Undefined variable $tag in /home/gogohito/gogohito.com/public_html/wp-content/themes/cocoon-child-master/functions.php on line 79
Warning: Undefined variable $tag in /home/gogohito/gogohito.com/public_html/wp-content/themes/cocoon-child-master/functions.php on line 79
Warning: Undefined variable $tag in /home/gogohito/gogohito.com/public_html/wp-content/themes/cocoon-child-master/functions.php on line 56
WordPressでBlogを作り始めたら、プラグインが多くありのでどういう設定をしたら、どういう動作をするのかを調べることをしてみたい。
ただ、レンタルサーバの本番環境でガシガシ試していた。
しかし、記事が増えてくるともし壊れてしまったら・・・。
そう思って、簡単に仮想環境が構築できるvagrantをインストールし、ローカル環境を準備することにしました。
現在使っているのが、Windows 10 Proなのでこの環境にインストールします。
vagrantとは
vagrantとは、VirtualBoxやVMWaereなどの仮想化ソフトと合わせて使用することで、仮想環境を簡単に構築したり、破棄したりできるソフトウェアです。
また、Boxという形式で仮想環境を共有することができます。
このVagrantは、Windowsのほかに、MACやLinuxで動作させることができます。
この仮想環境を共有するというのは、CentOSの仮想環境が欲しいと思ったら、Vagrant Cloudから検索することができます。
ここに共有されているBoxという仮想環境をダウンロードし、ローカルのvagrant環境に設定すれば、あら不思議、簡単に仮想環境ができてしまいます。
とても便利な環境になります。
もし、この仮想環境を共有する機能がなかった場合は、仮想環境をOSのインストールから初めて、すべての環境を一から構築する必要があります。
しかし、vagrantを使用することで、これらの手順をすっ飛ばして仮想環境を構築することができます。
とても簡単で、素晴らしい。
事前準備
今回は、Windows 10 Proの環境にインストールします。
また、Vagrantは、仮想化ソフトとしてVirtualBoxやVMWareなどのソフトが必要です。
どちらでも構わないですが、VirtualBoxを既に準備してあるのでこちらを使います。
VirtualBoxをインストールしていない方は、Windows10にVirtualBox(Ver6.1)をインストールする方法を参考に準備してください。
- OS
Windows 10 Pro (64bit) - 仮想ソフト
VirtualBox v6.1 - Vagrant
ver 2.2.7
vagrantのインストール
vagrantのインストールは、インストールする環境にあったインストーラを入手し、ウィーザードに沿ってインストールするだけなので非常に簡単にインストールできます。
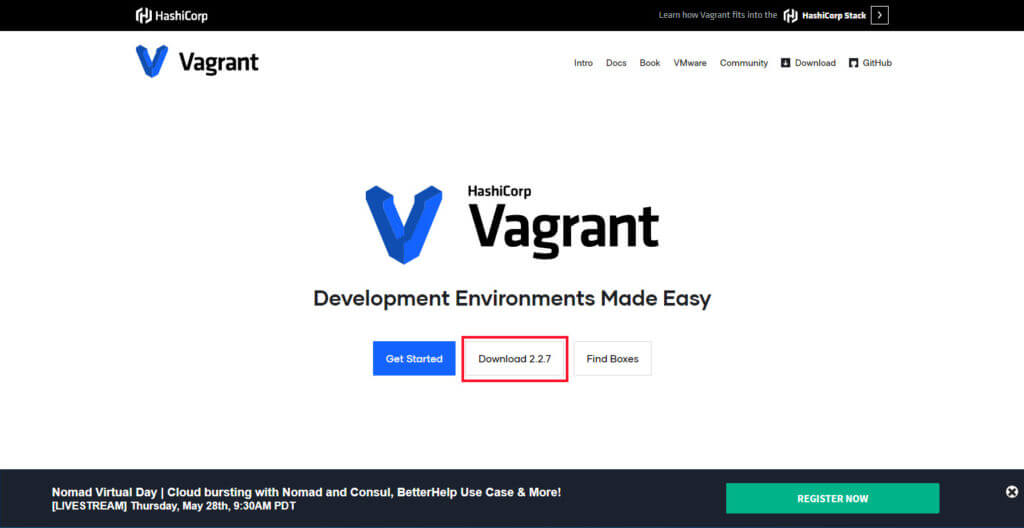
Vagrantのダウンロード
Vagrantの公式ページからインストールするファイルをダウンロードします。
「Download 2.2.7」を選択してvagrantのダウンロードページへ遷移します。
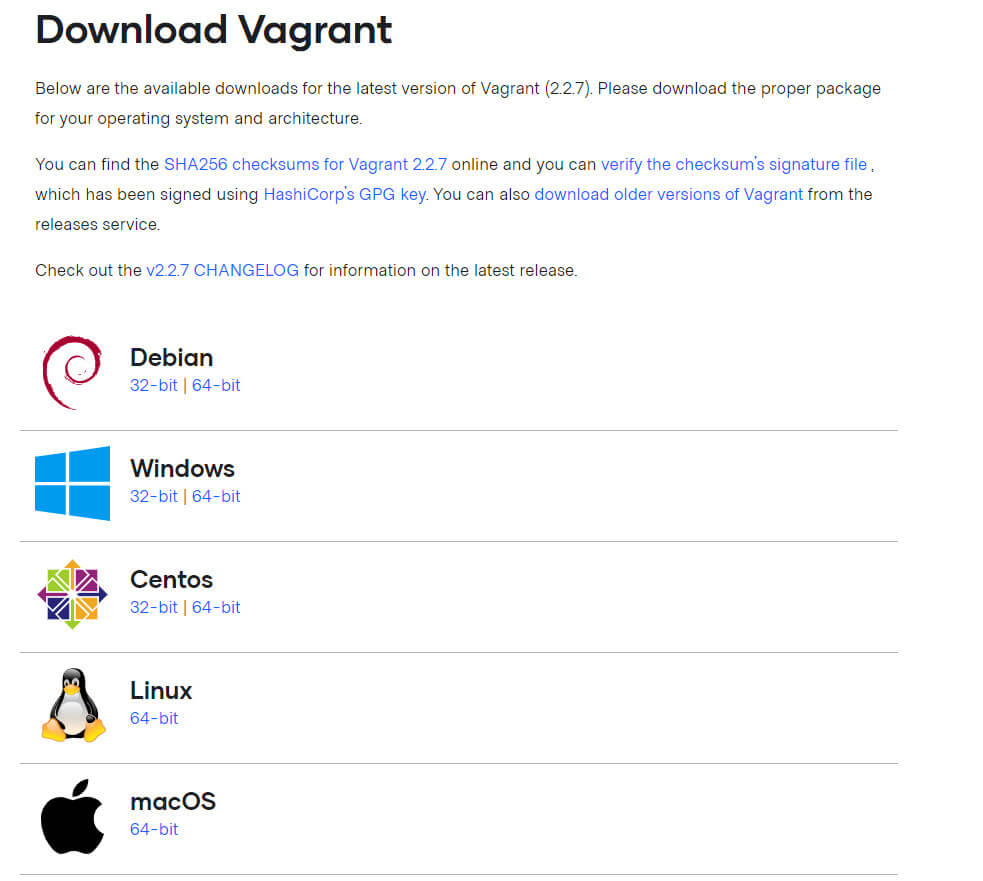
ダウンロードページで、インストールする環境のインストーラを入手します。
今回は、Windows環境にインストールしますので「Windows 64bit」を選択します。
インストール
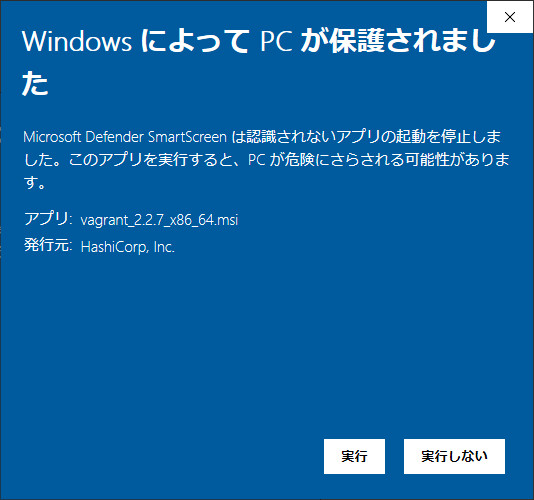
Windowsの64bit用なので「vagrant_2.2.7_x86_64.msi」というファイルがダウンロードされています。
入手したインストーラを実行します。
Windowsからセキュリティ警告が表示されますので「詳細情報」を押します。

実行しようとしているソフトウェアを実行してい良いか確認されますので「実行」を押してインストールを進めてください。
インストーラのウィザードに従って、インストールを進めます。
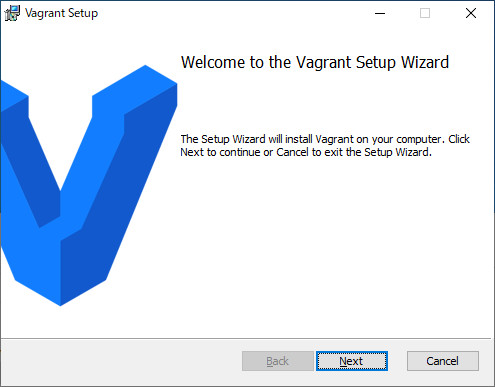
「Next」を押します。
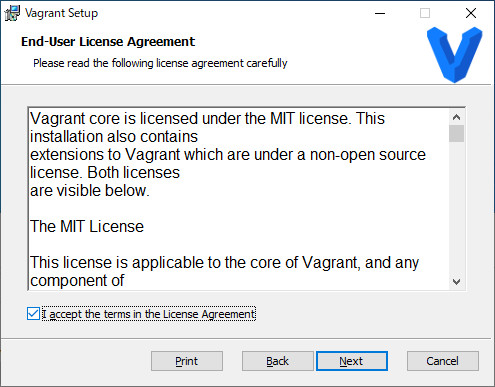
「ライセンス」の確認をして「Next」を押します。
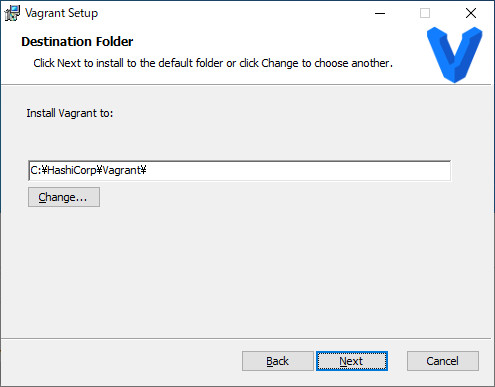
インストールする場所を指定し、「Next」を押します。
※通常は、デフォルトのままで問題ありません。
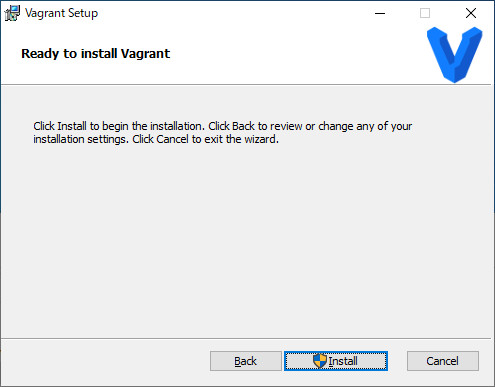
「Install」を押しインストールを開始します。
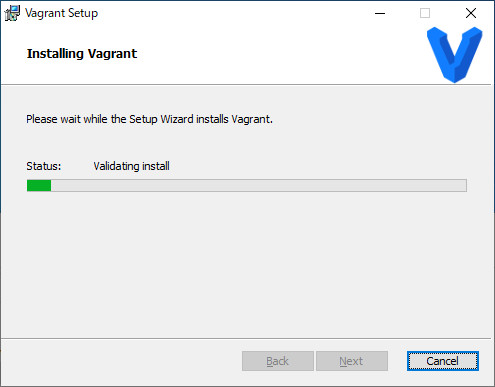
インストールが開始されます。
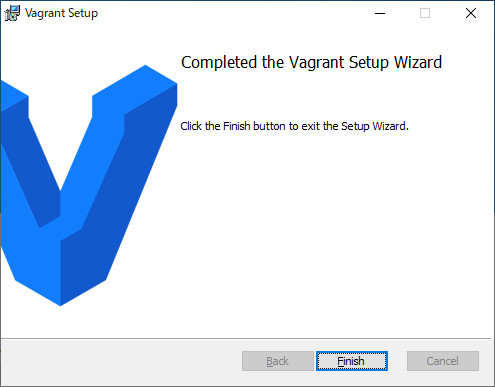
セットアップが完了したら「Finish」を押します。
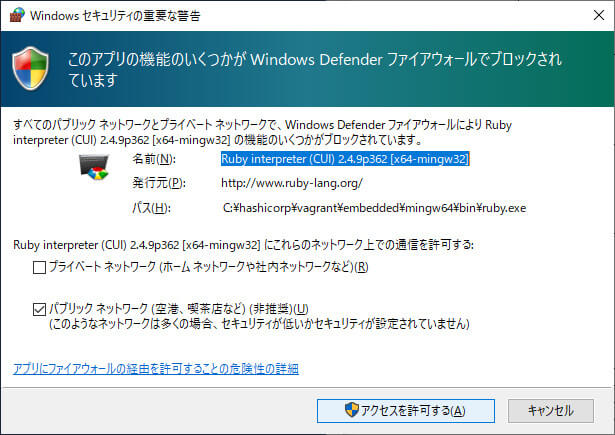
インストールをしている中で、WindowsDefendefからのセキュリティ警告が表示されます。
これは「アクセスを許可する」を押します。
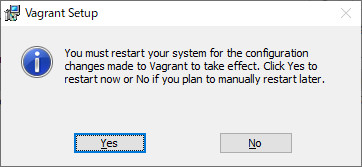
再起動の確認がありますので、「Yes」を押して再起動してください。
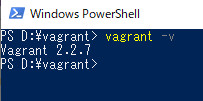
再起動後、コマンドプロンプト、または、PowerShellからvagrantコマンドでバージョン確認をしてください。
インストールされたバージョンが表示されれば、インストール完了です。
Vagrantで仮想環境構築
インストールが完了したら、実際にSentOSの環境を構築してみます。
どのぐらい簡単に構築できるかが体感できると思います。
※仮想環境を配置する場所に、VirtualBoxを使用しますので、インストールしていない方は、Windows10にVirtualBox(Ver6.1)をインストールする方法を参考に準備してください。
vagrantで、仮想環境を作成するには、次の3つの手順で行います。
- STEP1作業フォルダの作成
Vagrantの環境を構築するための任意のフォルダを作成します。
- STEP2設定情報ファイル(Vagrantfile)の作成
設定情報ファイルを作成し、4項目指定します。
- 仮想環境のOS
- IPアドレス
- ホストとなる仮想ソフトウェア
- メモリサイズ
- STEP3Vagrantの起動
Vagrantを起動します。
これで、仮想環境ができてしまいます。
※テスト的に構築するので、実際に構築するときはもう少し詳細な設定が必要になります。
Vagrantのフォルダの作成
vagrantの作業場所として、任意の場所にフォルダを作成します。
このフォルダには、構築する仮想環境の設定情報ファイル(Vagrantfile)を格納します。
PowerShellかコマンドラインを起動して下のコマンドを実行します。
mkdir \vagrant\test
cd \vagrant\test
テストで仮想環境を構築するので、「\vagrant\test」というフォルダを作成し、ここに仮想環境を構築してみます。
設定情報ファイル(Vagrantfile)の作成
次に、vagrantが仮想環境を構築するために、設定情報ファイル(Vagrantfile)を作成します。
ひな形は、vagrantがコマンドで作成してくれます。
vagrant initコマンドプロンプトで実行すると「Vagrantfile」が作成されます。
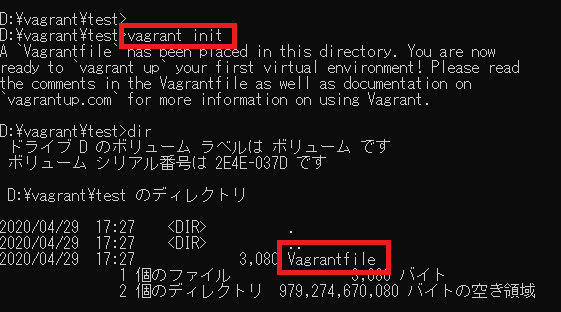
このVagrantfileファイルを開いて編集します。
# -*- mode: ruby -*-
# vi: set ft=ruby :

# All Vagrant configuration is done below. The "2" in Vagrant.configure
# configures the configuration version (we support older styles for
# backwards compatibility). Please don't change it unless you know what
# you're doing.
Vagrant.configure("2") do |config|
  # The most common configuration options are documented and commented below.
  # For a complete reference, please see the online documentation at
  # https://docs.vagrantup.com.

  # Every Vagrant development environment requires a box. You can search for
  # boxes at https://vagrantcloud.com/search.
  config.vm.box = "centos/7"

  # Disable automatic box update checking. If you disable this, then
  # boxes will only be checked for updates when the user runs
  # `vagrant box outdated`. This is not recommended.
  # config.vm.box_check_update = false

  # Create a forwarded port mapping which allows access to a specific port
  # within the machine from a port on the host machine. In the example below,
  # accessing "localhost:8080" will access port 80 on the guest machine.
  # NOTE: This will enable public access to the opened port
  # config.vm.network "forwarded_port", guest: 80, host: 8080

  # Create a forwarded port mapping which allows access to a specific port
  # within the machine from a port on the host machine and only allow access
  # via 127.0.0.1 to disable public access
  # config.vm.network "forwarded_port", guest: 80, host: 8080, host_ip: "127.0.0.1"

  # Create a private network, which allows host-only access to the machine
  # using a specific IP.
   config.vm.network "private_network", ip: "192.168.33.10"

  # Create a public network, which generally matched to bridged network.
  # Bridged networks make the machine appear as another physical device on
  # your network.
  # config.vm.network "public_network"

  # Share an additional folder to the guest VM. The first argument is
  # the path on the host to the actual folder. The second argument is
  # the path on the guest to mount the folder. And the optional third
  # argument is a set of non-required options.
  # config.vm.synced_folder "../data", "/vagrant_data"

  # Provider-specific configuration so you can fine-tune various
  # backing providers for Vagrant. These expose provider-specific options.
  # Example for VirtualBox:
  #
   config.vm.provider "virtualbox" do |vb|
  #   # Display the VirtualBox GUI when booting the machine
  #   vb.gui = true
  #
  #   # Customize the amount of memory on the VM:
     vb.memory = "1024"
   end
  #
  # View the documentation for the provider you are using for more
  # information on available options.

  # Enable provisioning with a shell script. Additional provisioners such as
  # Ansible, Chef, Docker, Puppet and Salt are also available. Please see the
  # documentation for more information about their specific syntax and use.
  # config.vm.provision "shell", inline: <<-SHELL
  #   apt-get update
  #   apt-get install -y apache2
  # SHELL
end
このファイルは、vagrant initで作成したものを編集していきます。
- config.vm.box
「centos/7」を指定し、CentOS ver.7の仮想環境を構築します。 - ip:
IPアドレスは、192.168.33.10です。これは、デフォルトでこの設定になっています。
変更の必要があれば、変更します。 - config.vm.provider
仮想化ソフトウェアとして、VirtualBoxを使用しますので、「virtualbox」を指定します。 - vb.memory
メモリは、1024MBで作ります
Vagrantの起動
作成したVagrantfileから、Vagrantの仮想環境のセットアップと起動を行います。
vagrant upこのコマンドで、起動するべき仮想環境が作成されていない場合は、仮想化ソフトウェア(VirtualBox)に環境構築して、起動します。
なんて便利なんでしょう。
初回は、環境がないので起動に時間がかかりますが、2回目以降はすぐに起動します。
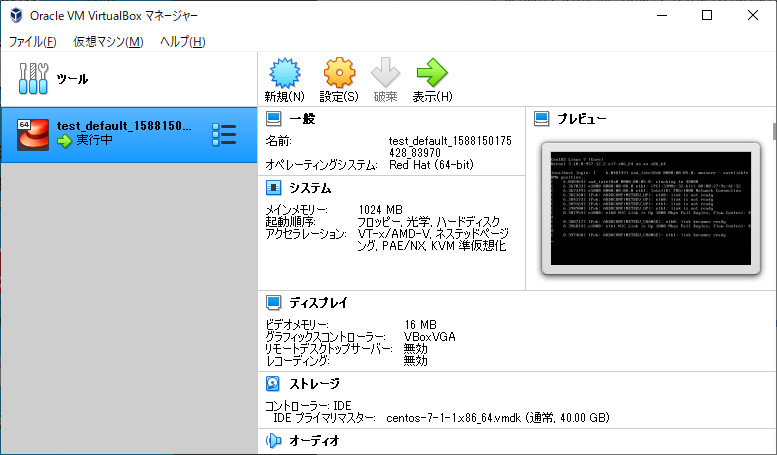
コマンドの実行が終わったら、VirtualBoxに仮想環境が登録されているか確認します。
D:\vagrant\test>vagrant up
Bringing machine 'default' up with 'virtualbox' provider...
==> default: Box 'centos/7' could not be found. Attempting to find and install...
    default: Box Provider: virtualbox
    default: Box Version: >= 0
==> default: Loading metadata for box 'centos/7'
    default: URL: https://vagrantcloud.com/centos/7
==> default: Adding box 'centos/7' (v1905.1) for provider: virtualbox
    default: Downloading: https://vagrantcloud.com/centos/boxes/7/versions/1905.1/providers/virtualbox.box
    default: Download redirected to host: cloud.centos.org
    default:
==> default: Successfully added box 'centos/7' (v1905.1) for 'virtualbox'!
==> default: Importing base box 'centos/7'...
==> default: Matching MAC address for NAT networking...
==> default: Checking if box 'centos/7' version '1905.1' is up to date...
==> default: Setting the name of the VM: test_default_1588150175428_83970
==> default: Clearing any previously set network interfaces...
==> default: Preparing network interfaces based on configuration...
    default: Adapter 1: nat
    default: Adapter 2: hostonly
==> default: Forwarding ports...
    default: 22 (guest) => 2222 (host) (adapter 1)
==> default: Running 'pre-boot' VM customizations...
==> default: Booting VM...
==> default: Waiting for machine to boot. This may take a few minutes...
    default: SSH address: 127.0.0.1:2222
    default: SSH username: vagrant
    default: SSH auth method: private key
    default:
    default: Vagrant insecure key detected. Vagrant will automatically replace
    default: this with a newly generated keypair for better security.
    default:
    default: Inserting generated public key within guest...
    default: Removing insecure key from the guest if it's present...
    default: Key inserted! Disconnecting and reconnecting using new SSH key...
==> default: Machine booted and ready!
==> default: Checking for guest additions in VM...
    default: No guest additions were detected on the base box for this VM! Guest
    default: additions are required for forwarded ports, shared folders, host only
    default: networking, and more. If SSH fails on this machine, please install
    default: the guest additions and repackage the box to continue.
    default:
    default: This is not an error message; everything may continue to work properly,
    default: in which case you may ignore this message.
==> default: Configuring and enabling network interfaces...
==> default: Rsyncing folder: /cygdrive/d/vagrant/test/ => /vagrant

D:\vagrant\test>
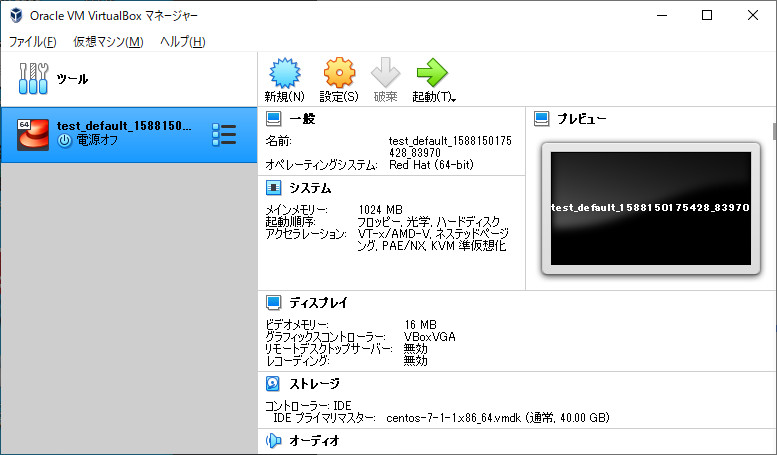
Vagrantのコマンドが終了したら、VirtualBoxを起動します。
「test」という仮想環境がVirtualBoxに登録されていることが確認できます。
構築されたCentOS7の仮想環境にコマンドプロンプトからログインしてみます。
vagrant ssh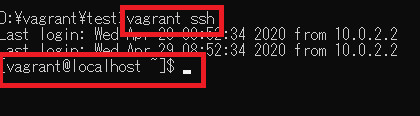
無事にログインすることができました。
これで、CentOS 7の環境がローカルに構築できてしまいました。
非常に簡単です。
環境の停止
続いて、仮想環境を停止します。
vagrant halt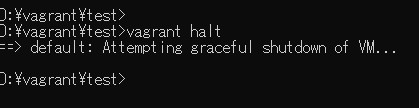
停止した様子を、VirtualBoxにからも確認できます。
Vagrantの仮想環境を削除
不要になった場合や、一度構築しなおしたい場合に仮想環境を削除します。
削除するのは、あくまでもVagrantで構築した仮想環境のみです。
Vagrant 自身が削除されるわけではありません。
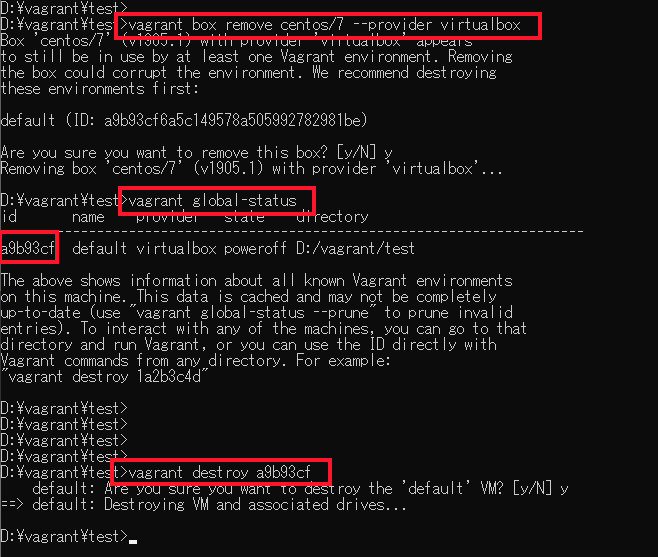
- STEP1Box情報の削除
Vagrantに登録されている仮想環境情報リストから削除します。
実行コマンド:vagrant box remove centos/7 –provider virtualbox
- STEP2破棄するBoxのIDを確認
破棄するBoxのIDを確認します。
実行コマンド:vagrant global-status
- STEP3仮想環境の破棄
STEP2で確認したIDをもとに仮想環境を破棄します。
実行コマンド:vagrant destroy a9b93cf
※この例では、BoxのIDが「a9b93cf」となっています。
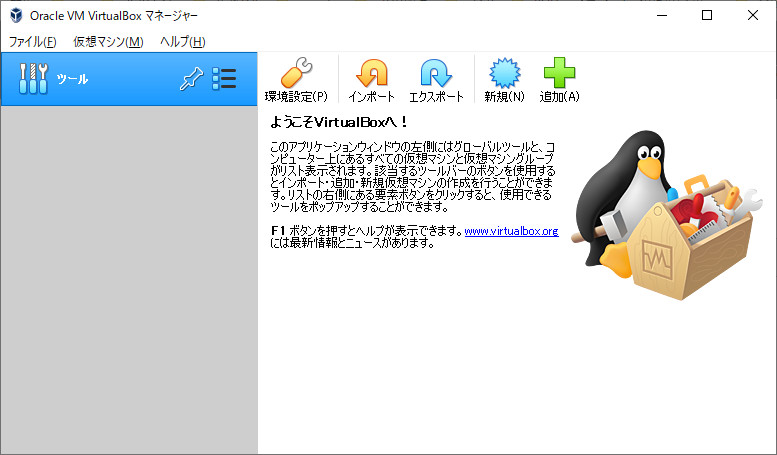
これで、Vagrantからも、VirtualBoxからも、削除されました。
確認してみます。
VirtualBoxからも削除されています。
まとめ
Vagrantを使用することで、テスト環境を簡単に構築することがわかりました。
必要な仮想環境は、Vagrant Cloudから検索してみてあればそのまま使用することができます。
これは、非常に便利です。
一からOSをインストールして環境を作らなくてもよいことを考えるとインストール失敗による時間の無駄がなくなります。
さらに、複数のOSで実行したい場合などは環境構築にかかる時間が圧倒的に少なく済みます。
技術者が、何かを試したい時なども有用です。
ただ、一からインストールする楽しみはあるので、それは別途楽しんでください。
コメント